

Brandmerry Blog Archives

Brand Storytelling Guide

Everything you need to know about storytelling as an entrepreneur.
Let's dive into why storytelling is essential 👇
WHY STORYTELLING IS SO IMPORTANT AS AN ONLINE BUSINESS AND BRAND
I like to use the Ice Cream Sundae analogy when talking about your brand and storytelling.
Imagine for a second that your brand and story are the ice cream. The ice cream alone is delicious and something you can enjoy just as it is or you can enhance it to make it even better.
Now, let’s imagine the marketing, funnels, ads, social media platforms, etc are chocolate syrup, nuts and whipped cream. Mix those together and have them stand alone; it’s kind of just a mushy, nutty sweetness. Definitely not as good as it is with ice cream.
The point is your brand and story can stand alone and make you money. The marketing strategies can not. You need to have the entire package for those to even work.
You need the whole package.
WHY STORYTELLING WORKS IN ONLINE MARKETING
When you add storytelling to your messaging and content it is 22x more likely to be remembered
Not to mention it helps in the decision-making process. A report from Harvard University found that 90% of purchasing decisions are made subconsciously and based on emotional connection. Emotional connection comes from trust and storytelling.
So you’re also more likely to convert your clients into a sale by using storytelling.
AND not to mention the average time someone spends on a website is 8-15 seconds. Yet, this is where all the information about your business is. So, how do you keep them captivated for longer? Storytelling and strong personal messaging.
That’s because storytelling makes your brand:
Captivating - pulls in your ideal customer
Memorable - at the front of their mind, even as they scroll
Trustworthy - builds an emotional connection to you and your brand
It Starts With Your Brand Identity 👇
What is Brand Identity?
Let's talk specifically about how Brand Identity helps your brand as a whole. So, brand identity is the personality of your brand. It is that experience that you are creating.
It is the combination of values, your mission, how you want people to feel, that emotional side. It's that entire experience and it's one of my favorite things to talk about.
You've actually probably heard me just refer to it as branding because to me that's truly what it is.
We have had such an evolution with what branding is and what's important when it comes to branding. From just thinking it was a logo and your colors to understanding that it really is about the human connection, values, mission, and emotional connection you’re creating.
So, I will refer to just brand identity as branding. I interchange them all the time because that's just the direction that we're heading with branding overall.
So branding is really about that experience, creating that experience and putting a personality to your brand.
When you're creating a personal brand it makes it a lot easier because you're front and center, you're sharing yourself, you're sharing your stories. So, that personality just naturally happens which is why personal branding is so powerful.
So if you want to learn a little bit more about emotional branding and all those different things, after this video make sure you definitely check out my blog. I have tons of content over there on emotional branding and just the foundational pieces of branding. I've got some YouTube videos on it as well.
And if you go to my Facebook I've got an entire folder of videos on that as well.
So when you think of Brand Identity, I want you to think about the personality behind your brand and the experience you’re creating for your audience.
What is YOUR brand story?
The first thing that you've got to do is figure out what your brand story is. So this will look different for different types of businesses. There are different ways and structures to actually create your brand story based on your personal story and based on your individual business.
But really what I want you to focus on now is stripping away the, "How do I write this on my about me page?" And, "What does this look like on my bio, on my homepage?" Strip all that away and just focus solely on the story.
In fact, when you're writing this out I want you to think about actually telling this story to someone.
Some of you might want to even record it and transcribe it. It might feel a little bit more natural to you.
Ultimately, what you want to do is highlight and share the journey that has happened that led you to the creation of your brand.
Your brand is not a product, your brand is not a service specifically, it's the whole thing.
It's that umbrella, it's the work that you're putting out into the world, it's your mission, it's who you ultimately want to impact all rolled into one. And you want to share the evolution of how that came to be.
So I want you to strip away, “How is this structured?” and “How does this flow?” and really just allow yourself to tell the story. That's where all the goodness gets to go in. And then when we format, we can pull out the unnecessary pieces and clean it up a bit.
But I want you to just deeply understand what has led you to this moment and think of really telling that story to your audience.
For example, when I talk about my brand story, one piece of that is this underlying feeling of not living a life based on other people's expectations or going against the status quo.
And I know that that's important to my audience, that's important to you, that's something that you also believe in. I share that through my storytelling and I share that through my brand story to get that message across.
You're probably already picking up on it, but your brand story is where that connection can really start for many of you. Because once we get to formatting it for an about me page, or we get to putting it out there in social media, it might be one of the first things that people see and you have an opportunity to build that connection with them right out of the gate.
Focus on taking your audience on this journey, write out your brand story and become really clear on what you ultimately want to share about your journey and what has led you to the brand that you are creating today.
how to Identify The Brand Emotions
Step two is to elevate the experience by focusing on the emotional connection.
And this is where we really take your story and spin it around to pull in your audience and build that trust.
I call these brand emotions and I encourage you to identify five brand emotions for your brand as a whole.
Don't get too obsessed with the number. It could be three, it could be six, it could be seven. Don't do 25 or something like that. I find five is the sweet spot.
But you really want to ask yourself, "How do I want my audience to feel?"
I mean, the reality is you've got eight seconds to make an impression.
That's not a lot of time to read an entire message on a piece of content. It's not a lot of time to read a bunch of stuff on your homepage.
You've got to make that first initial impression a good one and powerful, and that really comes down to that emotional connection. How do people feel when they land on your website, when they see a piece of your content?
In order to exude that, in order to allow people to feel that, you need to know what you want people to feel.
Take the time to identify those brand emotions.
I want to give you two examples, because I know sometimes you might be thinking, "What do I want people to feel, Michelle?"
I have a client who is in the mindset space, the spiritual mindset space specifically, and she supports women in moving through a very difficult period of their life. She does a lot of shadow work. Her clients are currently in a difficult time but they are moving towards the light. They want to understand how to get there, they want to feel supported through that process, and they want to do it in a way that feels good and not forced.
We know this about her audience and we also know from her brand story she's really good at it. So when we were thinking of her brand emotions we wanted to show the light. We wanted to show what was possible, the desire, and what her audience was wanting to move towards.
Because her audience didn't want to neglect where they were and that was really, really important to communicate, we played with sharing that through messaging, through story, through brand colors, showing both the dark and the light.
That's just one example but again it comes back to how do I want people to feel and ultimately what are they looking for? What are they searching for?
With my brand, I decided very early on, well actually after eight months of having a brand that was not me at all, I redid the whole thing and now it's great. But when I redid it, I got back to this core piece of storytelling and brand emotions and I asked myself, "How do I want people to feel?"
And it kept coming up for me that I wanted people to feel safe and comfortable and that they could be their authentic selves. That there was this connection between the two of us, between my brand and between them and their story. That it almost felt like we were sitting cozied up by a fire on a fall day just having a really deep conversation and chat.
I used that to motivate all of these different pieces that we're going to talk about in just a second.
Again, take the time to understand who you are and the journey that you've gone on to get to where you are, to have the brand, the mission, the values, the core beliefs and the impact that you want to make in your ideal customer's life. As well as understand how you want them to feel from the moment they come in contact with your brand, through all of those different pieces.
Now that brings us to, "Now how do we actually use this Michelle? How do we use this? This all sounds great, I love it, but how do we use it?"
Let's talk about how we use that brand story and those brand emotions to enhance and communicate and have this wonderful experience also known as brand identity.
How Often Should You Share It? 👇
The truth is you should be sharing story in every piece of content you create, but when you’re just starting out you might just have you Brand Story or Founders Story and that’s ok. Here are some suggestions on where to share it!
10 WAYS TO SHARE YOUR BRAND STORY online
Now, you’re ready! You know the power of sharing your story with the world, you’ve identified your story and now it’s time to share it.
Below, I’ve included 10 DIFFERENT places to share your Brand Story as a way to build brand awareness and community. I’ve marked the ones that can be repeated ever 30 days with an *.
On the homepage of your blog (include a small excerpt similar to a social post)
On your About Me/ My Story page (want my tips on this? Click here)
The sidebar or footer of your blog
Social Media post (includes Facebook and Instagram) *
IGTV video
Insta Stories *
As a highlight on your Instagram
Introduction in a Facebook Group *
Youtube video (tied in with your favorite tip within your niche)
Live video (Facebook) *
That’s one freaking story, imagine what you could do if you repeated this over and over again for your most important stories - the ones that share your expertise, relate to your audience and build trust.
Pretty cool stuff, right?
So, Should You Repeat Your Story? 👇
WHY REPETITION IS IMPORTANT IN MARKETING
Now, that we’ve covered how to effectively repeat stories in business, let’s dive deep into why this is so important.
Remember, the information I’m sharing here doesn’t just apply to storytelling, it applies to marketing as a whole. Think of repeating not just your stories, but your messages, offers, freebies, etc...and why it’s essential when building an online brand.
---
Unfortunately, the number of contact points needed before someone becomes a customer is growing. There is just so much information online and with the algorithm changing frequently, it’s important that we’re consistently showing up for our audience if we ever want to make money online.
While there's no clear number for contact points, the standard is:
BRAND AWARENESS: 3 points of contact before someone will pay attention to your brand
SALES: 7 points of contact before someone will take action or make a purchase decision.
As you can see repetition is necessary when it comes to marketing your business, because the odds of someone seeing your content, thanks to the algorithm, and taking action after one message is very slim.
In addition to the multiple contact points needed, there is also the concept of The Frequency Illusion (or Baader-Meinhof phenomenon). It’s the illusion that we see or hear the same thing everywhere.
The best way to describe this is when you’re thinking about buying a new car and you decide on the one you want and then you see it EVERYWHERE!
This illusion is something we as marketers need to remember and use to our advantage. It’s why you see retargeting ads when you search for something on Google or visit a website.
The reason so many marketers are using this principle in business is that the more we, as consumers, start to see or hear the same message we begin to think of it as important. It heightens our awareness and moves the brand, product or service up the importance meter; essentially you’re adding importance and urgency to your offer.
You can achieve this by consistently showing up with your content so you’re top of mind, sharing your brand story so people actually know who you are and utilizing retargeting tools in advertising.
Repetition is key in not only making sure our audience sees our message and making sure it is of importance to our audience, but also because it builds brand credibility and trust.
The final thing I’ll share with you on repetition in marketing is the power of sharing your core stories and messages across all platforms. When we do this we’re creating brand affinity and brand messaging consistency and consistency builds trust.
If someone lands on your Facebook page and then heads to Instagram and maybe your website, is it the same? Does it feel like the same brand and message? If not, you’re breaking trust.
When we think of utilizing this for your Brand Story, I want you to think about posting the entire thing on your “About Me” page, then sharing a variation of that on your Homepage and Blog sidebar, Facebook, a one-liner on Instagram and so on…
...this repetition and consistency in messaging will build trust with your audience quicker.
3 WAYS TO IMPROVE YOUR REPETITION IN STORYTELLING
1. SWITCH UP THE EMPHASIS
As I mentioned in the beginning, it’s important that even when sharing the same story, think of your Brand story, that you switch up the way you tell it and the emphasis.
Focus on pulling different parts of the story based on your central theme or goal. If you need a refresher scroll up for my brand storytelling example.
This works wonders because the art of storytelling is about showcasing a moment in time. So when I share my Brand Story, I might focus on the moment when I realized I lost myself in the branding process because of comparisonitis. Then, I might share the story later and focus on the moment when I realized branding wasn’t about the font, colors and logo.
You can also switch it up based on what’s happening in your business or what’s timely in the world. For instance, when COVID first started I saw so many of my friends, family and community members worried about working from home with kids. So, I started sharing more of my stories and experiences of running my business and working from home with my son for four years.
You can modify stories, emphasizing different parts, and sharing them in different ways to build brand trust and affinity.
2. EMBRACE THE ART OF REPURPOSING YOUR CONTENT
Your audience needs to hear things multiple times, this is why I love repurposing to make sure my content every week is reaching my audience!
As we’ve mentioned it requires multiple touchpoints for your audience to take action, but who the heck has time to come up with new content every single day? Not me!
That’s why I shared an entire blog post on The Art of Repurposing, which you can check out here.
I can't tell you how many times I put something on my Instagram Stories, and I'll send an email, and I'll make an Instagram post and then, after all those other posts, I'll post on Facebook and someone will respond with, “Oh, I didn't even know you were offering this!”
The reality is our audience are busy living their lives, so if we’re not repeating our content and repurposing it we’re doing a major disservice to our marketing.
Just like your Brand Story, the concept of repurposing is taking your content and sharing it multiple ways on multiple platforms.
You can check out my blog on Repurposing here.
3. IDENTIFY YOUR CORE BRAND STORIES
Did you catch the plural there? The truth is there are so many types of stories we should be sharing in our business. Aside from your Brand Story or Founders Story, we also have the collection of stories that showcase your brand values, pillars or framework of your offer and your brand mission.
The more you, as a brand, can share these stories the more you’ll attract a community of people who are in alignment with your brand and brand mission and that is important.
Once you have these stories in your Story Bank, you can add additional stories and sprinkle them into your content at any time you’re posting...and yes you need a story every time you post content!
Think of it like this, you create a content calendar of posts you want to make over the next 30 days. These are timely pieces that promote your freebie, your offers, share value. Then you go through each of them and pair it with a story from your Story Bank.
Do you see how easy it is to incorporate storytelling into your business? And it’s so powerful.
What About Imperfect Stories 👇
How to Share Imperfections and ‘The Messy Middle’ in Storytelling
So now that we understand vulnerability and transparency as it applies to storytelling, let’s talk about imperfections or ‘The Messy Middle.’
How do you share stories and when do you share stories that feel raw?
I’ve got a couple of rules here that you will want to steal, so grab that notepad.
RULE #1: IS IT SACRED?
It’s important to make sure the stories you share feel aligned, so you need to ask yourself, “Does it feel good to share this story or a small part of this story?”
As I mentioned in the blog a few weeks ago, storytelling is not about a period in time, but a moment in time. If the period as a whole doesn’t feel good, can you strip it back and share a moment.
Example: When I was sharing about the birth of my son in the beginning I was still in the postpartum experience and it felt raw, but I knew it was an important part of my story as it related to my brand. So I chose the parts that felt good to share, including why I started my business and what it was like to build the business with a baby. As time went on and my brand evolved I would share more and more.
So ask yourself if what you’re wanting to share actually feels good and if it feels better to strip it back, then do that!
RULE #2: DON’T SHARE IT WHILE YOU’RE IN IT
Remember, you’re building a business not just talking to your friends on the internet, so the stories you choose need to be strategic.
As a business owner it’s important that no matter how vulnerable or transparent you are, you still need to be the guide for your ideal customer. If you’re going through something at that moment and are wondering how to share it, it’s going to be hard to be the guide or show the value.
You’ll notice in my business I don’t talk about life as it’s happening, in fact, I rarely post in real-time even while traveling. I wait till I’ve experienced something and then I weave it into my content by telling a story.
An example is in 2019 when we started traveling I had a hard time navigating this new schedule and lifestyle. That was hard and I was in it so I didn’t talk about the hard stuff openly on social media. As time went on and I got my grounding I could talk more about it and share the lessons I learned as a way to provide value to my audience.
So, remember if you’re in it don’t share it. Take the time to go through it and look back on the lessons you learned so it provides value to your audience.
RULE #3: IT MUST PROVIDE VALUE
Arguably the most important part of the storytelling process is your audience. Although the stories might be yours they aren’t for you. When you’re sharing stories as part of your brand and business you want to make sure they are of value to your audience.
When you think of these stories, run them through my 2-part question test…
“What value does this story provide my audience?”
“How does this story build trust with my audience?”
If you can’t answer these questions with clarity, no matter how authentic, transparent or vulnerable they might be then it’s not the right time to share them. Put them away in your story bank and come back to them later.
Ok, Ready For Some Content Examples? 👇
5 EXAMPLES OF BRAND STORYTELLING
So many entrepreneurs never think of sharing their story outside of their Brand/ Founder Story, but that’s only a small piece of the puzzle.
You can’t share your brand story every single day on social media and every offer you create needs a little more attention than just how your business was started.
This is where different types of stories come into play.
1. THE TESTIMONIAL STORY
The stories you share in business don’t have to be your own, they can be stories from your client and community members. This is a great way to share social proof and do more than just post a 2-3 sentence testimonial on your website.
When asking for feedback or testimonials be sure to ask multiple questions about where your audience was, where they are now and what changed for them. Along with your testimonial statement, you’ll be able to use this information to tell stories on social media and in your email marketing that helps your audience make a purchase decision.
Bonus Tip: Videos are a great way to share stories. Have your client create a short video sharing their story and share it during your next launch or promotion.
2. THE TRANSFORMATION STORY
The transformation story can fall into The Testimonial story above, because who doesn’t love a great before and after. If you’re in fitness, health, wellness, products or even service-based you can use the transformation story constantly.
Here are some examples:
Fitness - Share a before and after photo of a client or yourself
Product (Skincare) - Share a before and after photo of someone using your product
Graphic Designer - Share the before and after of your client’s graphics
The possibilities are endless.
But, I’m going to encourage you to think a level deeper and share your own micro transformations. Think of the things happening daily that your audience can relate too.
Some places to start are moments of “failure,” mindset shifts, overcoming obstacle and stories of success. Seriously, I bet if you sat down with pen and paper right now you could come up with at least 20 posts.
3. THE BEHIND-THE-SCENES STORY
These are great stories to show what you do and your process in business, as well as build trust with your audience.
Human to Human or Relationship-Building Marketing is on the rise. People want to know the brand they are investing in. One of the ways to build this trust and go beyond just a product or service you sell is to invite your audience behind the curtain.
This is one of the reasons I love showing up on Instagram Stories. It’s a simple way to share my day to day, my role as a mother, my love of gardening, our travels and my business.
My audience gets to see multiple sides of my personality, which also builds Brand Affinity, and as a result, the trust is accelerated.
If you sell a product consider sharing the behind the scenes of how you make the product.
If you’re a coach, show your client calls and trainings.
Show how you manage your day-to-day, the things you love and how you take on the other roles in your life.
These stories are powerful and some of the easiest to start with.
4. THE VALUE STORY
Last week on the blog we talked about identifying your core stories early on. These core stories include:
+ Your Founder/ Brand Story
+ Your Mission and how it came to be
+ Your Why or Purpose Story
+ Your Value Story
It is important that as a brand and business owner that you create these micro-stories that show your values in action, affirm your values and share why you have these values.
For example, one of my values is authenticity. That's just not a word that I like to use for marketing, I truly believe it to my core. I share that value in my stories because I want to attract people who share the same value.
This is where Brand Affinity becomes so powerful because brand affinity is that shared mission, those shared values. It goes much deeper than someone saying, “Oh, you're cool. Oh, I like your product or your service. Let me check it out.”
It's much deeper than even trust, it’s a shared value.
Share these values to bring in the people that align with your values, the things that are important to you, and let the others drift away.
5. THE DISRUPT STORY
When it comes to the Disrupt Story, I’m slightly obsessed. I believe this story is an excellent way to share your values and your beliefs and separate you from others in your industry.
You know you have an industry-standard or common thread of beliefs in your industry. You see them in every Facebook group and on websites that all start to look the same.
Think about your own business, your superpower, your teachings and pull out the pieces that go against the grain.
For instance, last year I did an entire email series called Behind The Brand. I called out beliefs inside the industry around branding. Some examples were:
+ How the industry defines success
+ The truth about templates and how they create inauthenticity and a copy and paste culture
+ Transparency and vulnerability as a business owner
I also talk about the power of a brand and why I believe that without a brand you don’t have a business, something that goes against other mentors and coaches who “skip” branding.
These types of stories have allowed me to talk about my business, but also call my audience to speak up. When I share the disrupt stories I always attract new community members, increase my engagement and sign clients.
People want transparency, authenticity and something different. This story does that!
Here’s an example of The Disrupt in action.
Oh, And Don't Make This Mistake 👇
BRAND STORYTELLING SECRET WEAPON
When you are telling stories in business they are for your ideal customer, they are for your audience...they are not for you!
You're not buying your own stuff, so the story is not for you.
The ultimate goal is to attract your ideal customer and dream audience, build trust, build brand recognition, brand affinity and ultimately tell stories that sell.
The beautiful thing is that you can use stories at every single level of the buying process. Whether someone isn't aware of their problem.
They're aware of their problem.
They're aware of a solution to their problem.
They're aware of products but haven’t made a decision, you can incorporate stories to move them along.
So no matter where your ideal customer is in the buying process stories are an excellent marketing strategy.
You might tell a story about your situation…
You might tell a story about your transformation…
You might tell a story about your values…
But if you're not tying that to your audience, it becomes a cool-story-bro situation.
It becomes a “that's nice” situation.

- FREE GIFTS YOU'LL LOVE -



DISCOVER YOUR BRAND STORY IN UNDER 5 MINUTES
LEARN HOW TO WRITE AN ‘ABOUT ME’ PAGE THAT CONVERTS
MAP OUT 30 DAYS OF CONTENT IN UNDER AN HOUR
- READ THE LATEST POSTS -






MEET MICHELLE
Hey there, I'm Michelle Knight and I an online branding and marketing consultant for female entrepreneurs.
I believe in the power of storytelling and using that superpower to brand and market yourself online...oh and to set yourself free.
I'm obsessed with living a life of freedom, so much so, that my family and I now travel full-time while running my business from the road.
This blog serves as a home base for all things branding, marketing, content creation and more.

My Top 4 Tools to Increase Productivity in Business
If you’re like me you’re always interested in increasing your productivity and becoming more efficient with your time as a business owner. Today, I’m sharing 4 tools to help you increase productivity in business.

My Top 4 Tools to Increase Productivity in Business
BY MICHELLE KNIGHT

We’re continuing our Tools in Business Series over here and chatting about our top tools for productivity over here at Brandmerry.
If you didn't already know, I'm a big, big fan of optimizing my time.
I have a lot of podcast episodes about time management and Monday With Michelle episodes about time management because time to me is my greatest asset and I want to make sure that all of the things that I am doing as a business owner are really optimized to use my time at peak performance.
Because, like you, I’m not only a business owner, I am also a mother, a wife, and a woman. And I want to make sure that I'm not spending all of my time running and scaling my business and that I'm spending optimal time doing the things that I love.
Yes, I love running my business, but I also love traveling, I love working out, I love having fun and hanging out with my family and experiencing life.
When I'm sitting down to work, I want to know that what I'm working on and the process that I'm going through to do it is allowing me to get it done in an efficient manner.
My husband and I often joke that efficiency is key over here, and these tools that I'm going to share with you today have really helped me do just that.
The following are my top tools that we use over here at Brandmerry to increase productivity, and whether you're a solopreneur or you're working with a team, these productivity tips and tools will allow you to grow your business efficiently.
SMALL BUSINESS PRODUCTIVITY TOOL #1: Slack
The first one that I want to share with you is called Slack.
Many of you are probably familiar with Slack, but some of you might not be.
Slack essentially allows me to not live in my inbox. I do not have time for that.
I have very specific times of the day when I'm checking my email. I typically check it twice throughout my workday, depending on what's happening. I check it first thing in the morning and then I check it right before I close my computer for the end of the night.
The thing that I love about Slack is that the people who need to get in touch with me regarding important things that are happening within the business, contractors and team members, all communicate via Slack.
By using Slack, we're not sending email chains back and forth and making sure that everyone's CC'd. By avoiding this mess, it has helped tremendously in my business because I don't have to check my email often.
As a result of not living in my inbox, I'm not getting distracted with things that are coming in that aren’t a priority, but then end up pulling my attention from what I was doing. I know you all know what I'm talking about.
Slack is a really great way to keep the team communication going and to even have communication with your clients.
I know a lot of people who use Slack to communicate with their clients as well. You can use it and make it your own, but I absolutely love it because it's a clean platform that allows you to handle communications without living in your inbox.
I have to say, like I know I'm talking about tools today, but that's a side tip as well. Don't spend all your time in your email.
Turn off your notifications.
I promise you the world will be okay if you're not living in your inbox.
SMALL BUSINESS PRODUCTIVITY TOOL #2: Task Management Tool
The second tool that we love to use over here at Brandmerry is a task management tool.
Now, there are a lot of options out there, and I want to share with you the one that we used to use and where we've shifted to and why in 2021.
Originally I was using Trello and Asana in my business.
Both are absolutely amazing tools in their own right, and Trello worked really well for me as a solopreneur. I still use it from time to time to organize content ideas, map out launches and organize my weekly schedule using the card feature.
Trello was something that I was using mostly to manage my own schedule, my weekly workflow, and the things that I needed to do. I wasn't using it to communicate with my team because I found that it wasn't really supportive in doing that, but it was great for managing my own tasks and priorities.
Then, as a team, we were using Asana.
Asana was really helpful in organizing our tasks that were repeating themselves every week, and to be able to assign new things when we were preparing for a launch. We would list out every single thing that needed to be done, assign it to whoever needed to do it, and put a deadline on it. So everyone's really aware of what was happening in the big picture, and the things that they needed to do individually.
Then, in early 2021, we made a big shift and elevation in my marketing strategy.
If you followed any of my videos, workflows are something that I use consistently in my marketing strategy.
Every single week we are following the exact same workflow to make sure that I'm creating consistent content that not only attracts new community members, but also nurtures my audience, and ultimately builds that know, like, and trust value with you.
Having consistent content is really, really important as a business owner and it's really important to me as well because I have found that creating consistent content actually leads to an increase in sales. As a result of this and to make sure we honor this consistency, we have this weekly workflow that we are repeating.
As we elevated the Brandmerry workflow this year, we found that we needed to switch platforms in order to serve the new communication at the highest level.
The platform that we are using today is called ClickUp, and I highly recommend it. It's kind of a combination of Trello, Asana, Airtable and so much more.
You can really do a lot inside of this platform, and it's super customizable. There are a lot of different features including team chats, embedding Google Docs and Folders, assigning everything to different people, tracking progress, checklists and more.
But, while we found ClickUp to work best for us, choosing a task management platform is based on your needs. I really think you can’t go wrong, but if you don’t have one in place you’ll struggle.
As a solopreneur, you might not think it’s necessary, but you’re going to want to hire support and a team down the road.
If you start putting your daily tasks into workflows, into SOP’s (standard operating procedures) for your business, then when you bring people on, it's much easier for you to say, "Hey, these are the things that I would like you to do."
Otherwise, when you decide you're going to bring people on to your team, then you've got to take everything out of your head, remember everything, put it on paper, put it into task management and that’s just adding more work to you in the long run.
I recommend getting a task management platform started right now, no matter what you choose, and getting in the habit of putting your tasks and putting your workflows on there.
I've also found that using these platforms takes the mystery out of, what should I be doing, or what do I need to do this week? And we're less likely to miss something or forget to do something because we know that it's in our platform.
SMALL BUSINESS PRODUCTIVITY TOOL #3: Loom
The third productivity tool I want to share with you is called Loom.
I record a lot of videos over here at Brandmerry, and if you are in the coaching, consulting, strategy business, you're probably making a lot of videos as well. Whether you have a course or a membership site, or you're working with your clients and offering feedback.
I have found that the process of recording and saving and downloading and uploading and sending and all that stuff, is a massive headache. When I was traveling full-time in our RV in 2019 and 2020, I had very little internet most of the time so recording a video, then having to download it and upload it for my team required so much energy.
That’s when I really fell in love with Loom because it allows you to record things on your computer and save it to a cloud drive which your team can then access.
It makes the entire process so easy because you can record your video directly in Loom.
You can choose to record just videos of your face, or screen-share or even a combination of the two.
A lot of my training videos that I have are a screen-share, but my face in the bottom left-hand corner, so they feel more personal to me and my brand.
I often will record feedback videos for my clients if they are creating a sales page or a new free gift for their audience and rather than typing up all of those notes, I’m able to walk through the video with them on screen so they can make adjustments. What would take 30 minutes of my time, suddenly takes five.
And perhaps my favorite part is that once I record it, it's there.
All I have to do is send a link to my client and say, "Here's the link to your video. Go ahead and watch your feedback."
If Delana on Team Brandmerry is uploading a video into one of our courses, then she has a log-in to Loom and all she has to do is download the video on her end. I'm not downloading it, uploading it to Google Drive so she can download it, and then upload again.
Loom is a fantastic resource and saves a great deal of time. You don't realize how much time you spend with this whole download/ upload situation. When you can shave off 15, 20 minutes every single video, that adds up quite a bit.
SMALL BUSINESS PRODUCTIVITY TOOL #4: Calendar
The last one I want to share with you is something we all have access to, and it's your calendar.
When it comes to productivity, it can truly be that simple.
I have paper calendars for all of my upcoming dates and launches and projects that I'm working on so that I have a bird's eye view of what's happening in my business.
Then I also use my Google Calendar religiously. Every single thing is in my Google Calendar from a date night with my husband Ben to a workout, to a team meeting, to an upcoming launch that we are working on here at Brandmerry.
Every single thing is put into this calendar so that I am really filtering the things that are a top priority to me. Nothing gets on that calendar if it's not a top priority.
Using the calendar is a great way to also be in charge of your schedule to get in the habit of saying, "You know what? Yeah, I might have a 15-minute pocket here, but I want to use that to go make lunch or go walk around or do something,” rather than jamming your calendar.
I've found that having my Google Calendar filled out actually gives me more time and space to breathe, and I'm honoring my commitments at the same time.
So aside from all of the things that I've shared with you that are great for business, I will say that the Google Calendar that many of you have, but probably aren't using to its highest potential, can actually help you in business and in life the most.
It's super easy for you to get started with just this one tool.
We have a business calendar, so all of my business meetings are on there, and then I have a personal calendar where I put my workouts, as I've talked about with my morning routine on my podcasts before, as well as date nights, appointments, different things like that so that we're making sure nothing's overlapping.
I'm making sure to get tons of time in between, and again, I'm focusing on the things that are important that are moving my business and my life forward.
There you have it.
Those are the four productivity tools that we use over here.
We're really simple over here at Brandmerry and prefer to keep it very minimalist.
I promise you, just by using these four tools, you will notice a huge difference in how you're spending your time.
Watch the full video here!
P.S. Have you tuned in to The Beautiful Climb podcast? I release new episodes every other Friday on topics around productivity, motherhood, habits, goals and going after the life of your dreams! Check out past episodes and be sure to subscribe at thebeautifulclimb.com
- FREE GIFTS YOU'LL LOVE -
DISCOVER YOUR BRAND STORY IN UNDER 5 MINUTES
LEARN HOW TO WRITE AN ‘ABOUT ME’ PAGE THAT CONVERTS
MAP OUT 30 DAYS OF CONTENT IN UNDER AN HOUR
- READ THE LATEST POSTS -
MEET MICHELLE
Hey there, I'm Michelle Knight and I an online branding and marketing consultant for female entrepreneurs.
I believe in the power of storytelling and using that superpower to brand and market yourself online...oh and to set yourself free.
I'm obsessed with living a life of freedom, so much so, that my family and I now travel full-time while running my business from the road.
This blog serves as a home base for all things branding, marketing, content creation and more.

How to Create a 6-Figure Course Offer
There comes a point in business when having a course makes a lot of sense. Maybe it’s more revenue? More impact? Or that you want to get more of your time back! Today, I’m sharing how to create a 6-figure course offer step by step!
How to Create a 6-Figure Course Offer
BY MICHELLE KNIGHT
This post contains affiliate links which means if you make a purchase through a link, I may receive a commission at no extra cost to you!

I had to go through a lot of limiting beliefs about putting my work out there and believing that I could ultimately create a course that would deliver the same amount of value as working with me one-on-one.
After I went through all of the work on those limiting beliefs and served my clients at the highest level, I realized that one of the best things that I could do for my business was create this course.
The truth is having a course allows you to impact more people and that's always been the driving force for me and my brand. I'm very mission-driven, and I want to help as many entrepreneurs as possible understand the branding process and truly understand themselves more, which is my signature part of the branding process.
The only way to do that without trading my time and my energy for money was to create a course. I also realized that a course complimented my life pretty perfectly.
I love to travel with my family and I value my time as the highest value, and having a course allowed me to scale my business by creating recurring revenue that I knew and could pretty much count on every single month.
A COURSE IS POSSIBLE FOR EVERY BUSINESS
A course is a great idea for every type of business. I know people who have courses on dog-walking. So you could create a course around anything.
Some of my clients have courses around knitting, courses around mindset. No matter what you're doing in your business, there is an opportunity for you to create a course at some point in your journey.
Do I think everybody should just start creating a course right out of the gate? No, not necessarily, and we're going to talk about that today.
Now, the course that we're talking about today is my You! Branded course, which teaches you how to build a personal brand centered around your story so that you can attract your true fans and create a revenue-generating business.
I created this course in 2019 after following these five steps I'm going to share with you today.
After creating I continued to test the product and my marketing and continued to scale to a 6-figure cash offer in my business which has helped hundreds of entrepreneurs brand themselves online.
Step One: Master Your Framework
Your framework is really important.
To be honest, I did this in my business pretty early on and I've used it to be the driving force for all of my programs and courses since then. I developed it while working with private 1:1 clients.
It’s so important in business so it’s something I’ve included in my program You! Branded because I believe that your framework is part of the branding process.
So many people brand an offer rather than branding the business as a whole.
When you brand an offer out of the gate, then you have trouble with scalability, so what I want you to focus on is branding you, the entrepreneur, and then getting super clear on your framework.
Think of the ways that you support your clients.
Yes, even if you don’t have any paying clients yet you can map out the first version of your framework based on the problem your ideal customer is experiencing.
Everybody has a framework. I promise you that.
I started my business, offering coaching as a one-on-one service, and many of my clients start that way as well. In fact, I think it's one of the best ways to vet a course idea: Start working with people one-on-one, get feedback, map out your framework, figure it out, and then turn it into a course.
Do you have to do that? No, you don't, but many of my clients choose to go that route because it allows them to make money while they get their foundation and their footing started in their business, and then they're able to turn that into a course.
Regardless of if you choose to do a private service or not, understand your framework and what it provides your ideal customer is key.
The cool part about having your framework is that each of these different pillars, that make up the framework, can be broken down into individual courses, products, programs and offers or you could create a course that encompasses your entire framework.
An example of this is inside my program, Roadmap to Freedom I teach a large part of my framework, which includes:
Brand Foundations
Community Growth
Marketing (aka Attraction)
Selling with Authenticity
The only pillar left is Systems to Scale, which is focused more on my 1:1 clients. But, these 5 steps are my framework.
Inside of You! Branded I simply focused on providing one of the pillars and that’s my Brand Foundations.
This main pillar is then broken down into separate modules that support my client, which include:
Your Story and Niche
Your Ideal Customer
Your Messaging
Your Core Offer
Your Authentic Voice
Your Emotional Brand (Aesthetics)
As you can see, you can break everything down even further, but what this allows you to do is make sure that your courses always connect back to your brand framework and therefore create a client ascension model which improves client retention.
So, step one is to figure out your Brand Framework and then break that down, if needed, into your specific course.
Step Two: Build a Targeted Audience
The second thing that you want to do is build a targeted audience.
One of the things that I was doing for years was building an audience around the concept of personal branding, so when I launched my course, people were ready to buy because they were here for that purpose.
So if you've been building a business around this core idea from the beginning, you already have a community of people who are going to be interested in your course.
But if you haven't, and this is maybe a new idea, you can absolutely start building your community now and no it doesn’t have to take years to launch your course, but you’re going to need to W-O-R-K or pay money #truth
In fact, I recommend you start building your email list in your community long before the course is even ready so that when the course is ready, you can launch it and you have people to actually sell it to.
This looks like building your email list using the advanced marketing strategies that we teach over here at Brandmerry, on the Brandmerry blog and at Brandmerry Academy, on how to build your email list using SEO, Pinterest, YouTube and more.
Your goal is to bring in targeted people, the right ideal customer for your course.
That might look like a lead magnet specific to the course that you are ultimately going to be offering. In my case, I have a lead magnet called Your Personal Brand Roadmap that's all about your personal brand and what you need to do to create it.
That leads very effortlessly to my program and brings in people who are interested in personal branding.
When thinking of a way to build your targeted audience, think of something you can always offer like a video training replay, pdf download, checklist, audio download, or evergreen masterclass.
You’re going to want to run this continuously to make sure you have new subscribers daily in your business and use organic or paid strategies to drive traffic to your landing page for your free offer.
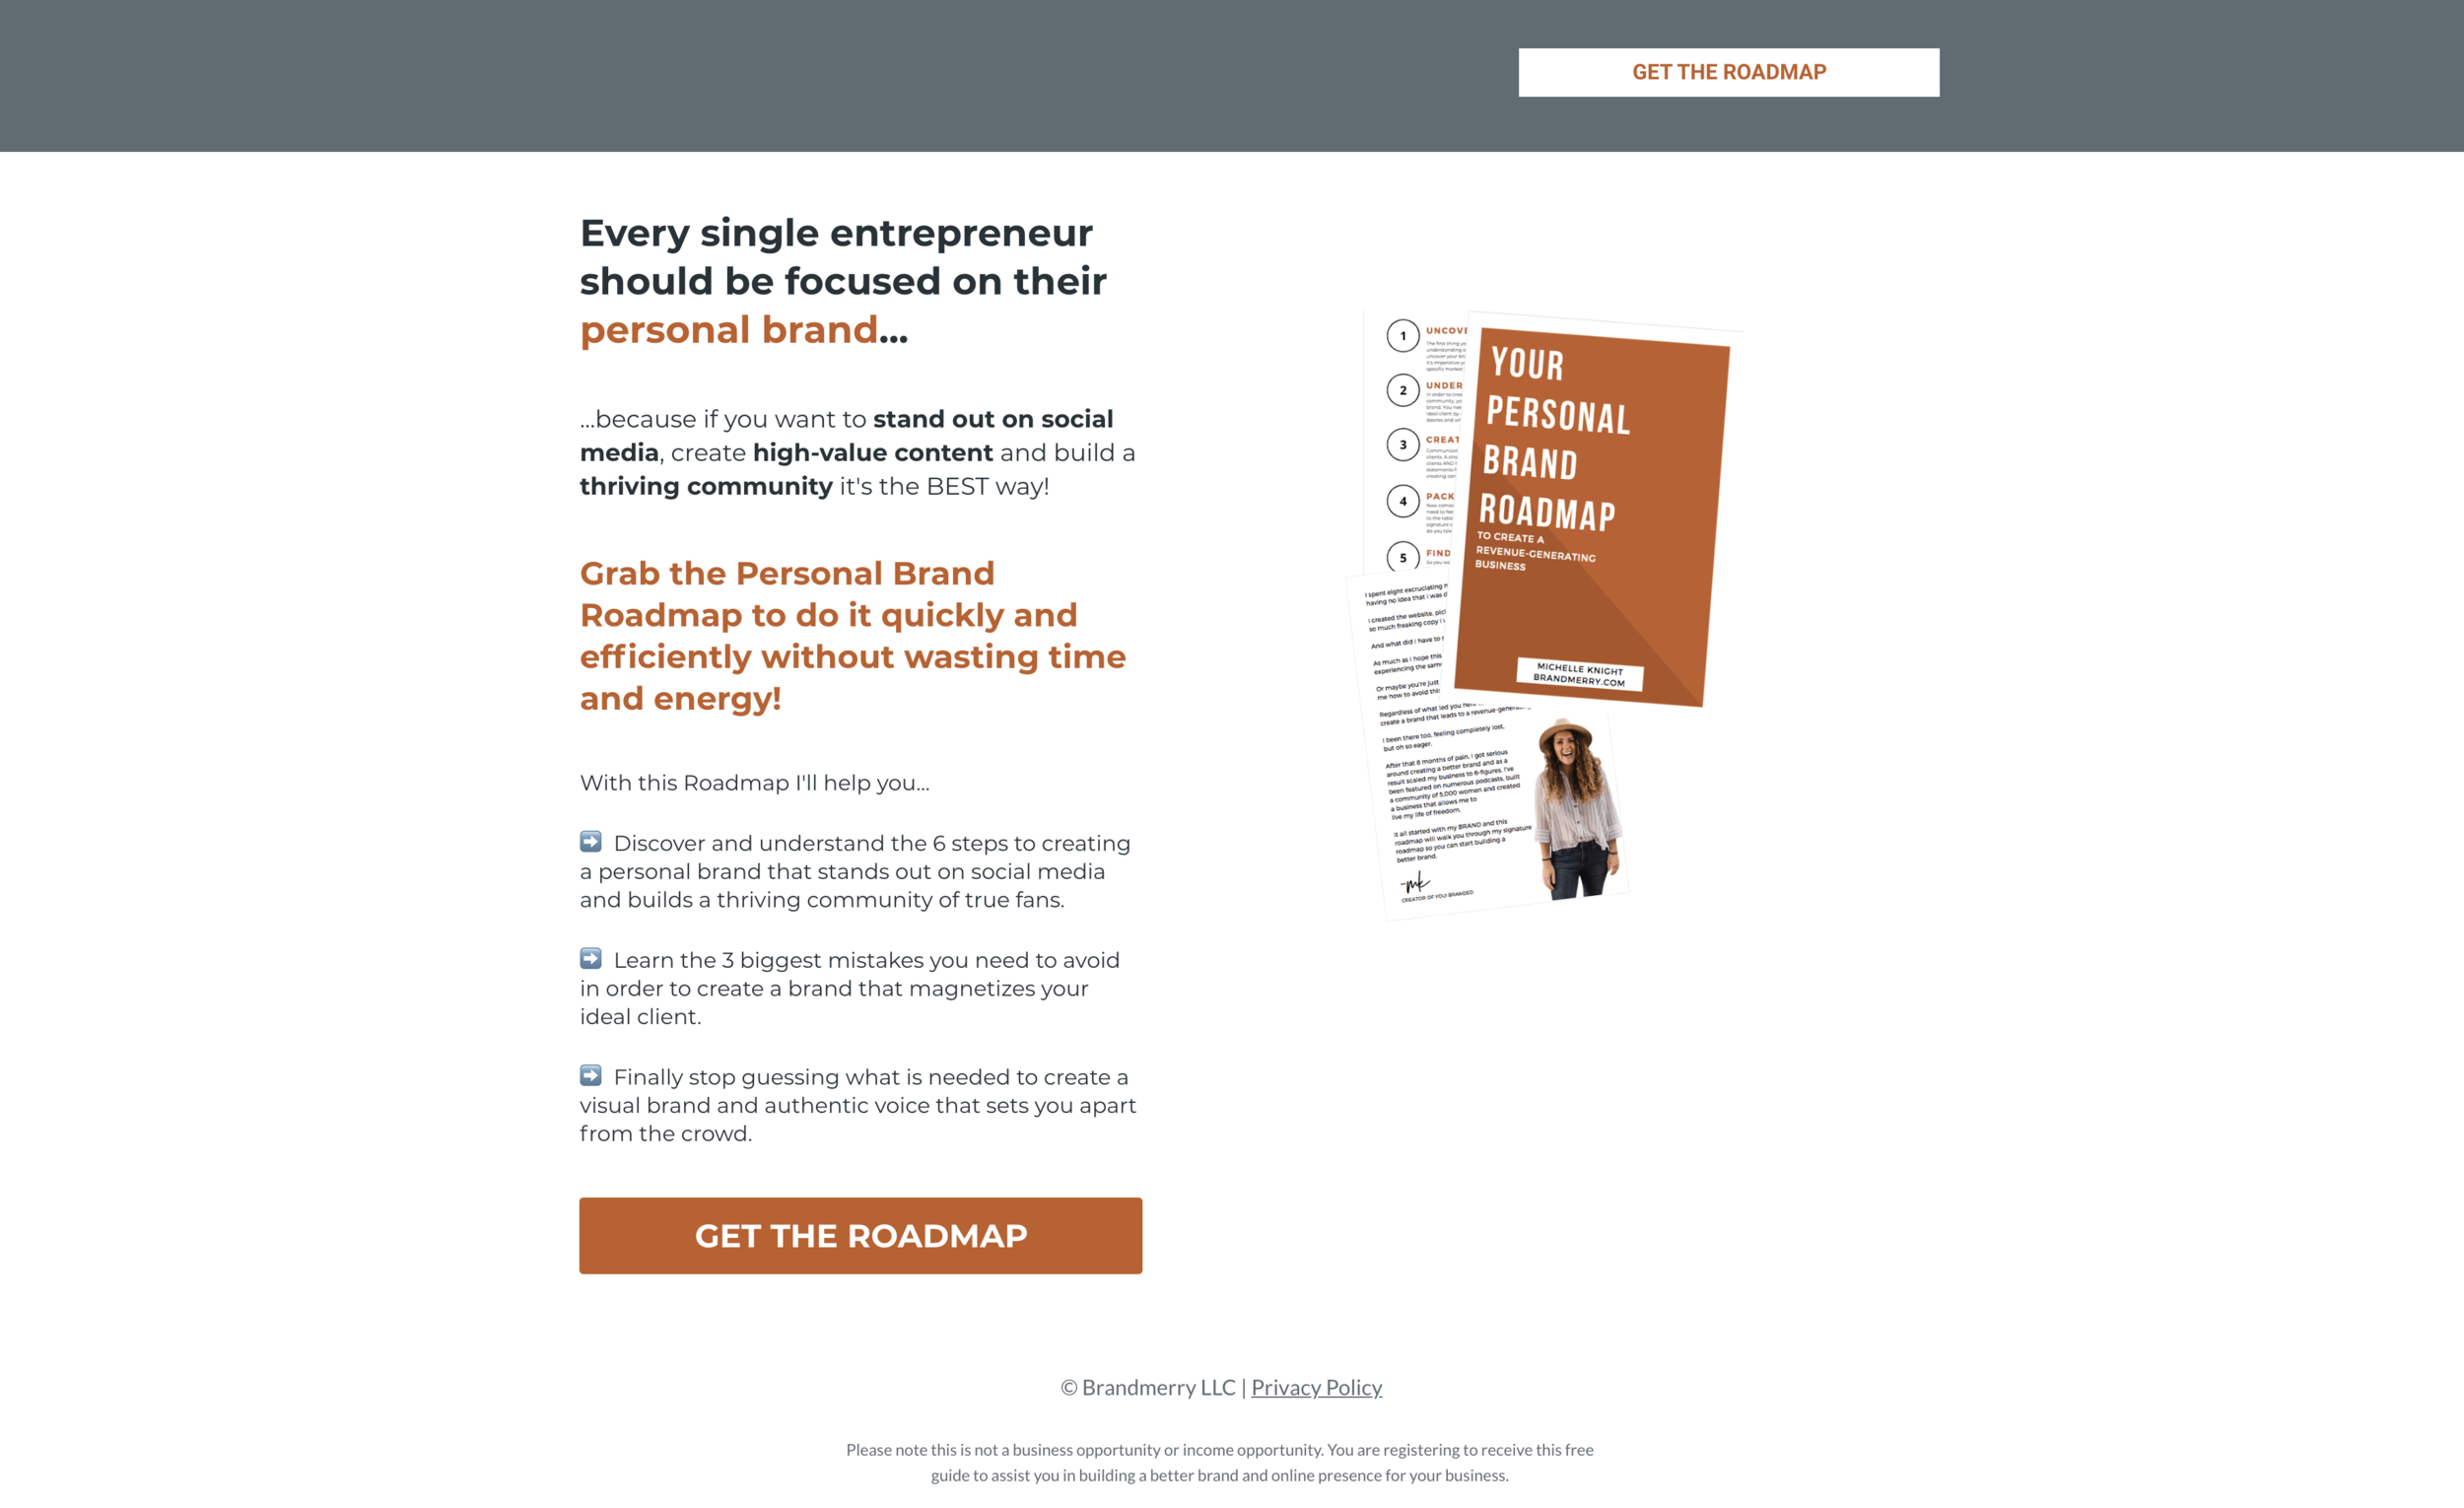
Remember, the goal is to have an audience to sell your course to, so give yourself plenty of time here.
Step Three: Create a Waitlist
Number three is to create a waitlist for your course and then tease your offer like crazy.
If you know anything about me, you know that I love showing up regularly for my audience. That includes blogging, video content, email, Instagram, social media, all the things, and I have a very streamlined repurposing plan that lets me stretch my content out on multiple platforms.
But when I was gearing up for my course, or any launch for that matter, I always talk about the course and that the doors will be opening way before it actually happens.
For instance, on episodes of my weekly show Mondays with Michelle, I would say, "I have a new course coming out called You! Branded, and you can join the waitlist here.”
I want to make sure to talk about it constantly so that my audience is ready to go when the doors open and I could answer any questions and handle any objections before the doors actually open. This is also a great time to talk about topics that specifically relate to your course, here are some examples:
No matter what model you choose, whether it’s evergreening out of the gate (which I did not do) or live launching (which I did) you want to make sure you lead your audience to the sale with quality content.
For a live launch, I recommend spending the first 30 days minimum teasing your offer and promoting the waitlist.
I tell my clients that the selling doesn't actually happen when the doors open through when the doors close, it's happening 30, 60, 90 days leading up to that.
So one of the best things that I did to launch my course the first time built this anticipation for a new course offer that I had. I had a substantial waitlist, and then I was able to have conversations with those waitlisters, getting them excited and ready to sign up for the program.
Step Four: Live Launch Your Course
That leads us to number four, which is where I live launched the program.
So I personally didn't go out of the gate and straight to evergreen (meaning someone could join the course at any time through a Facebook ad, class or funnel). I know a lot of people who love to teach that and that might work well for you, but I personally want to test things before doing that.
I want to test my messaging.
I want to test graphics.
I want to get feedback from people who’ve bought and those that didn’t.
So live launching is my favorite thing to do, to be in it, to hear from people and to be able to test everything then use that data to spend money and evergreen later on.
One of the things that I did when I launched You! Branded, was I launched it for a lower price because it was the first time that I was putting it out into the world. I launched it to my email list that I had been growing through my marketing, through my content, and I got a substantial amount of people to sign up. It ended up being about a $10k launch.
During the launch, I stressed that this was the first time this course was being handed to anyone and that feedback was essential. So I would survey them frequently and say, "How is it going? What's going on?"
I would ask in emails, I had assessments, we asked for testimonials, and then that allowed me to really pack my course with testimonials and proof when I was ready to ultimately evergreen the program.
I recommend live launching and getting those testimonials out the gate. Although some people refer to it as “beta” I don’t because I feel like “beta” is kind of like a cop-out.
It has an “I’m-just-kind-of-launching energy to it and I believe in just going for it. If you’re going to do it, just do it! Offer a discounted price if you want, but get people excited and get those testimonials, get that social proof, and use that for when you're going to launch and possibly evergreen the course later on in your journey.
Now, when you live launch, a couple of things that I want to just touch on: You absolutely can offer support. Some of the programs that I've put out into the world for the first time, I also offered support, a Facebook group or weekly calls or something like that.
But when I launched You! Branded, I really just said, "Hey, here's the program, here's the course. There's a Facebook group. You can ask me questions if you need to," because I knew that I was going to do that with the evergreen course as well.
I wasn't planning on doing calls or anything like that, so I wanted to really test that model with that first live launch, prove it works, prove people could get results, and then use that to my advantage.
And if you want to know some of my top tips for building your course, which includes selling it through a launch and then building it, check it out here.
Number Five: Evergreen the Course
That really leads us to step five, which is evergreening the course. Once you have gone through this process laid out for you above, you have testimonials and social proof the next step and quickest way to a six-figure course that's recurring is through this evergreen model.
That basically means that someone can sign up through an email funnel, through a masterclass, through a challenge, through a video series, and it's 100% automated.
Now, there still need to be deadlines or ways to add urgency even though it is evergreen.
For instance, if you watch my masterclass, you'll get an opportunity to join You! Branded, but you're only given that opportunity for a short amount of time. We have technology and cool systems in place that actually honor that. You can't access the sales page after your deadline has expired.
This model works really well because we're consistently bringing in new leads through my marketing efforts to the masterclass.
You're getting an opportunity to buy You! Branded through my email funnel, so we're getting daily and weekly sales for this product.
That truly is how businesses build these sustainable evergreen models.
A couple of things you need to know about when you plan for this stage.
TIP #1: KAJABI
You want to make sure that your course is set up for distribution.
Y'all know I'm a big fan of Kajabi over here, and if you go to brandmerry.com/kajabi, you can actually try Kajabi out right now and get a sweet bonus from me all about live launching.
If you join Kajabi through my link at brandmerry.com/kajabi, you’re not only getting the amazing all-in-one platform to market, sell and deliver your product, you’re also getting a sweet bonus from me to help you launch your program (see Step Four)!
Kajabi is a great platform to put all your course materials in, including: your videos, your audios, your workbooks, your notes, all the things. Build out a membership portal so that when people join, they have access to everything they need.


Remember, people are joining at any time with evergreen, that's the goal, so you want to make sure that they have access to everything that they need when they join.
With Kajabi, you're able to drip that content if you choose to do so and it's just streamlined and absolutely beautiful for your customer.
TIP #2: AUTOMATE YOUR ONBOARDING
Since people are able to sign up at any time, you want to make sure that the onboarding process is automated. You don’t need to be adding people manually at 3 am so they have their login information.
Again, we use Kajabi for this because we love the option of keeping it all in one spot.
From the second that someone buys the course, to receiving the confirmation page, to getting a confirmation email, to getting their login link, to filling out their assessment when they're done with the course, all of that is set up in Kajabi.
We even have emails that go out after someone completes each module, that say "Oh, my gosh, you're doing amazing. Keep going," and I really love that because even though it is an evergreen program, even though it's automated and you're not getting live support from me, it feels like that, that I'm supporting you every step of the way.


Again, Kajabi is a great platform to do that, but you want to make sure that your client onboarding is automated.
TIP #3: SELL IT
Then the goal is to figure out how you’ll sell it on evergreen.
Are you going to sell it on a masterclass, through an email funnel, a video series, a challenge?
What does this look like for you?
Remember, no matter what you choose you want it to be recurring, so you want to make sure that it’s not something you have to do live all of the time in order to make sales.
You absolutely can live launch it a few times a year. I will open the doors to You! Branded a couple of times a year, and that feels amazing, but we have this recurring evergreen revenue coming in the back. It’s important to have that in order to scale your business - consistent revenue.
Then scaling your offer is about testing! As you get the feedback you can adjust your program and your marketing strategy to make it even better. Looking at your data is key to make those adjustments as well.
Be open to knowing you don’t know what you don’t know!
Test
Test
Test
And make adjustments!
I really can't stress that enough.
So many people just jump in, start throwing money at their course without knowing their numbers. Make sure that everything is functioning inside of your funnel before you start scaling it.
Then get super clear on how much money you can give every single month, looking at your numbers and saying, "All right, if I spend a dollar, I make $4 off of this course, so I'm going to continue to scale that." That's what you really want to look at.
Those are some of the things that we teach inside of Brandmerry Academy because we love data. So looking at your number and scaling and adjusting your budget or efforts is truly the key.
You will create an evergreen product and it will be successful, but it does come down to your numbers.
When you follow these five steps, you're setting yourself up for success so that you have all of the pieces in place and then you can continue to grow and scale and build and build and build and build using things like Facebook ads, Pinterest ads, and organic measures like we teach inside of the academy.
CONCLUSION
I want you to know that creating a course is 100% possible for you.
I highly recommend it when it is the right time in your business and again, I recommend testing your materials, making sure they are proven, that they work, that you've got testimonials out of the gate, and then just continue to scale from there.
That's truly, I think, how everything in business works: test it, scale it, test it, scale it.
If you're ready to take action now and start building your course inside of Kajabi, make sure you go to brandmerry.com/kajabi and get signed up.
Remember when you join through my link you’re not only getting a free trial period but also a complete Launching Guide to help you host challenges, webinars and plan your launching strategy!
Get signed up at brandmerry.com/kajabi.
Watch the full video below!
P.S. Have you tuned in to The Beautiful Climb podcast? I release new episodes every other Friday on topics around productivity, motherhood, habits, goals and going after the life of your dreams! Check out past episodes and be sure to subscribe at thebeautifulclimb.com
- FREE GIFTS YOU'LL LOVE -
DISCOVER YOUR BRAND STORY IN UNDER 5 MINUTES
LEARN HOW TO WRITE AN ‘ABOUT ME’ PAGE THAT CONVERTS
MAP OUT 30 DAYS OF CONTENT IN UNDER AN HOUR
- READ THE LATEST POSTS -
MEET MICHELLE
Hey there, I'm Michelle Knight and I an online branding and marketing consultant for female entrepreneurs.
I believe in the power of storytelling and using that superpower to brand and market yourself online...oh and to set yourself free.
I'm obsessed with living a life of freedom, so much so, that my family and I now travel full-time while running my business from the road.
This blog serves as a home base for all things branding, marketing, content creation and more.

My Top 4 Tips for New Course Creators
Thinking about building an online course? There is a lot of information online, trust me when I was starting out I was overwhelmed with all the options. And while there are still a lot of options I want to share my top 4 tips for new course creators to try and help with the overwhelm.
My Top 4 Tips for New Course Creators
BY MICHELLE KNIGHT
This post contains affiliate links which means if you make a purchase through a link, I may receive a commission at no extra cost to you!

If you are an entrepreneur or you're thinking about becoming an entrepreneur, you have probably recognized that there is a lot of money in creating courses. And aside from the money aspect of it, which is why a lot of people gravitate towards it, the focus that I really want to put your energy towards is the impact that you can have.
If you are doing one-on-one services or consulting, you have a limited amount of people that you can work with at a time. And that's one of the reasons that I fell madly in love with creating courses.
It allows me to serve more people and to support more people without sacrificing my precious time, which you probably know is a huge value over here at Brandmerry and just for me as a human being as well.
So I thought it would be kind of fun to do a blog that is all about my top tips for new course creators.
Now, even if you're not new, maybe you already have a course, listen in because the information I'm going to share is going to save you tons of time, money, and energy in the long run. I really want to share this with you because as you know, streamlining and simplifying the process of running a business is so, so important and dear to me.
So these four tips are really designed to remove the overwhelm that you might be feeling on what is required to build out your course.
TIP #1: STREAMLINE YOUR PROCESS WITH AN ALL-IN-ONE PLATFORM
The first tip that I have for you is to make sure that you are not trying to piece it all together.
When you start out and look, I did it too, you want to bootstrap. I totally understand. I was the exact same way. And to be honest, I needed to.
But, when you're creating a course and you have intentions of evergreening that course, meaning you want to be able to sell this at any time and somebody can sign up at any time and it's not reliant on you sending an email or processing a payment or something like that, it is going to save you a lot of time and energy to have it all in one location.
In my business, I use a platform called Kajabi. Maybe you've heard me talk about it before, but Kajabi is an all-in-one platform for course creators.

What this allowed me to do was create the sales page, checkout page, confirmation page, process the payments, send the emails, send weekly check-ins and automated emails, deliver the materials, drip it, releasing it live, etc...all in one area.
When I first started my business and I was selling a group program and a few small courses, I was just piecing it all together and it became really messy and very confusing. If one thing didn't work, then I had to figure out what wasn't working and why it wasn't working and fix it.
At the end of the day, I realized I was actually spending more money.
By piecing together a bunch of different options that varied in price, I was actually spending almost the same amount of money that I would spend to just invest in a platform like Kajabi.
Not to mention, by switching to Kajabi, I also ended up saving myself a lot of time trying to build everything on different platforms. So I really recommend that everybody tries to find a platform that allows them to do all of those things.
Now is every platform perfect? No, of course not. It never works out like that. And everybody has different desires.
But I know for myself, when I was ultimately choosing Kajabi in the beginning, I wanted to have a way to stay in contact with my clients as well as to really streamline the onboarding process.
Don't try to piece it all together. You're going to recognize that someone is going to have to go to a sales page and then the checkout page, and then you need to email them their login information, and then you need to email them important information, and then they need to log in and then you have to house all the materials right?
There are a lot of moving parts. And the more that you can streamline that, have that all in one platform, the better it is going to be for you in the long run.
So, I recommend Kajabi to so many of my clients, and actually have a free trial for you. You can go to Brandmerry.com/kajabi to get started on the platform. In addition, I’m giving away a bonus when you ultimately commit to Kajabi which includes an entire mini-course on Launching.
Tip #2: TAKE CARE OF YOUR CUSTOMER WITH ONBOARDING
That whole process leads me to tip number two, taking care of your customer.
I don't know about you, but I've signed up for courses before and I’m so excited and then I don't get an email or I don't get the information that I wanted, or I don't get taken to a confirmation page.
Then I'm really confused about where I'm supposed to start and what I'm supposed to do. So one of my top tips for my clients is that you need to take care of your customers.
Think about if you were going through that process. Think about if you saw a course was for sale and you built up the courage and strength, you pulled out your credit card and you put your credit card number in there, and then suddenly you felt completely lost.
How would you feel? It wouldn't feel very good and it's going to put a sour taste in your mouth.
One of the best things that you can do truly for your business and for the longevity of your clients sticking around and referring their friends, is to take care of them from the very beginning and make sure that they feel super supported.
So when you are designing your course, so many people focus on just the course, and we're going to talk about that. But I also want you to think about that onboarding process because it is so important.
I would argue that making sure that your onboarding process is clear and has a step-by-step process, will save you money because you're going to have fewer people asking for a refund, feeling confused, ending up in your inbox, or just not knowing what to do overall.
So when it comes to the onboarding process, here's a very simple step-by-step that I recommend.
STEP ONE: THE CHECKOUT PAGE
Let's assume they go to your checkout page or a sales page. They're on your sales page learning more about your program. They click a button that takes them to the checkout page, whether you have a pay-in-full or a payment plan. One of the things that I love to include on a checkout page is a video.
Now I host the entire thing inside of Kajabi as I've mentioned before, so I can upload a video saying, "Hi, I'm so glad that you're here. Here's what happens next."

I'm taking away some of those fears that my ideal customer and potential client is experiencing like, "If I put my credit card number and what happens? Where do I go? What happens next?"
So I create a video that's me on camera sharing the step-by-step of signing up. I also love to recap on the checkout page exactly what they get and share some testimonials as well.
STEP TWO: CONFIRMATION PAGE
So they go to the checkout page, put in their card information, agree to your terms and policies, then what happens?
You take them to a confirmation page. Please don't skip this step. It's very important.
After they’ve signed up it's important to put their fears at ease. Trust me they are thinking, "Oh my gosh, I just put my credit card number and now what happens?"
This is why I love to create confirmation pages for my courses that are typically just me on video. I think that's such a great way to build trust and build a relationship with your audience by saying, "Congratulations, you're in. You did it. Here's what happens next."
I also like to type out any information that they might be getting in their inbox, let them know their login information is on its way, let them know that they're going to get an email with this, this, this and this.
I'm really just focused on guiding them through the process, holding their hand and making them feel really supported every single step of the way.
STEP THREE: DELIVER THEIR EMAILS
The next step is to deliver all the info they need to get started.
I love to deliver one email that contains their login information and another email that has more of the logistical pieces.
Where do they log in?
Do you have a community or a Facebook group where you're supporting them?
Are there calls that they need to put into their calendar?
How do they ask questions? What does that look like?
You can outline all of that inside of the email.
And, of course, I like to take it a step further, and you can totally steal this from me if you want, and actually say, "This is the first thing I want you to do. And the second and the third and the fourth," so that it's very clear and we can remove some of that overwhelm.
STEP FOUR: LOG IN
Then comes the final step of the onboarding process, and that's getting them to log in to where your course is.
When they log into your course, I love to have a welcome video there as well. In fact, inside of my programs, we have a start here section, which gives a walkthrough of the membership site.

It has a checklist if necessary and it tells them where they can get support and answers some more questions, encourages them to get started and tells them exactly where to start to get the best results.
It's really about holding your client's hand through the entire process, making sure that they feel supported and you've removed the overwhelm.
So my second tip is to put your time and your energy into creating a really streamlined onboarding process. And again, if you're using an all-in-one platform like Kajabi, you can do all.
TIP #3: KEEP IT SIMPLE
Don't try to be fancy.
When it comes to building out your course, I talk to so many entrepreneurs every single day.
They're like, "Well, I really want to launch a course but I want to wait because I need a backdrop. And I want to be able to hire a graphic designer for my workbooks. And I want to have a nice camera," and so on.
I’ve got to be honest - that is just keeping you from putting your content out there. And by delaying putting your content out there, you're actually delaying sales and the overall growth of your program.
I highly recommend that you are not fancy when you put your course out there the first time.
Many of my first courses didn't even have video, they were just workbooks, and I just created the workbooks in Pages on my Mac computer.
You do not have to have a fancy graphic designer helping you with your workbooks in the beginning. Go into Canva, choose a template and change it with your colors and some photos and truly make it your own.
When it comes to filming, so many people get hung up on the fact that they have to work with a professional videographer, or they have to have perfect lighting or a perfect backdrop.
That is absolutely not required, I still don’t do that in my course and it has served over 300 people. Remember, it's about delivering value. That is what people pay for. You can use your Quicktime or Loom on your computer to record, or just on your phone.
One of our favorite tools to use in course creation is Loom. Loom is an online program that you can use to record videos, store them in the cloud, and organize them. They're just a great place to do a screen share, the camera only, whatever.
Honestly, if we're talking like bare-bones, you need something to record on, which could be a computer, a phone, or a camera if you have it.
You need some sort of light, which could be your ceiling light. You could even position yourself in front of a window or purchase a cheap ring light and tripod online and make a workbook in Canva and that's it.
One of the things that I see holding course creators back is that they wait to put their materials out there because they want them to be perfect or professional. But the biggest thing that I've learned as a course creator is that you will modify and change as more and more people work through your program.
The best way to create a course that over-delivers, is super valuable, and is profitable for your business, is constantly making small adjustments. So if you're waiting to put the course out there until it's perfect, then you're not going to be able to make those adjustments and move forward with your progress.
The best thing that you can do is get your content organized, put it out there and then ask for feedback and make those adjustments as you go.
I keep mentioning Kajabi obviously because that's the platform that we use over here at Brandmerry, but inside Kajabi, I can upload my workbooks effortlessly.
I can upload my videos natively without having to use Youtube or Vimeo. If I want, I can upload an audio file.
You can choose to deliver your content in so many different forms making it really easy for your audience to access those materials on their desktop or on their mobile phone because you can download an app to use with the membership portal as well.
Keep it simple. Don't try and be super fancy with it because you're going to change and adjust as you go. That is the art of creating an amazing digital product.
TIP #4: GET PAID TO CREATE YOUR COURSE
We are coming in hot with tip number four and this is one of my favorite things to teach.
One of the coolest things that you can do is get paid to create your course. I mean when someone told me this when I first started my business I was sold within like five seconds.
Now I'm not talking about a beta program. Some people really love that and if that works for you, that's amazing, but I’ve found using the term “beta” gives you a little permission to not do a full launch or get paid.
I'm talking about actual cash in hand to then create the course.
Let me give you an example of this. One of the first courses that I created was called Brand New Adventure. I now have a branding course called You! Branded. You! Branded came from putting Brand New Adventure out there, getting paid for it, adjusting it over the course of a year, and then really packaging it into what I ultimately wanted to create, and adjusting the name and some of the marketing.
But when I first sold Brand New Adventure all I had was an outline for my modules, the onboarding process was done so I could accept payment and email my clients and I had a sales page, and that was it.
I sold Brand New Adventure, in fact, it was a $7,000 launch, my biggest at the time, and every week over five weeks, I would create the new module. I would drip a new module and video training on Monday and then I would support students inside the Facebook Group. I got paid to create the course and the program.
So if you've got an audience, even if it's a small audience, you can sell the course or the program before it's even created.
Similar to a membership site. If you want to host a membership site. We're talking about courses here, but platforms like Kajabi work for membership sites as well.
Brandmerry Academy, my membership community that teaches marketing, is hosted on Kajabi as well.

When I first sold that program, I didn't have all of the monthly trainings created. I created them as I went throughout the year with my Founding Members giving feedback on what they needed most.
This is a really smart business move because a lot of entrepreneurs will spend months and months and months creating a course, creating a program and then attempting to sell it and finding out that people don't actually want it.
You get to test your marketing, you get to test your messaging, and then you get to actually create it for someone specifically, get feedback, adjust it, and then evergreen it down the line if that's something that you choose to do. So it's such a fun strategy, get paid to create.
CONCLUSION
Those are my four tips for course creators and I highly, highly recommend you take them and you run with them. I wish someone would have told me these four things in the very beginning.
It would have saved me a lot of time and energy.
Speaking of saving time and energy, I clearly talked about Kajabi a lot. I don't recommend anything that I don't use and I don't believe in, and they truly are, in my opinion, one of the leaders in course creation because of the amount of time and energy and tech headaches that they will save you through the streamlined process.
If you’re interested in giving Kajabi a try, you can go to Brandmerry.com/kajabi and test it out.
When you wrap up your trial and become a paying member of the platform you’ll get a special bonus from me. This is only available to community members who use my custom link above.
Inside of this bonus is an entire training on hosting and selling on webinars authentically.
Might I add, not like sleazy, but like truly authentic, valuable webinars that convert. Hosting challenges, if you want to host a live video challenge to sell your course or sell your program as well as an entire training that I call Launchpad, which is all the step-by-steps of launching your course.
Kajabi will support you in creating your course, there are a ton of materials out there, but then you've got to know how to market it and launch it.
So sign up at Brandmerry.com/kajabi and sign up through that link, then you will be gifted my entire bonus bundle to support you in marketing and selling your brand new course after your trial.
Check out Brandmerry.com/kajabi for more info.
Watch the full video below!
P.S. Have you tuned in to The Beautiful Climb podcast? I release new episodes every other Friday on topics around productivity, motherhood, habits, goals and going after the life of your dreams! Check out past episodes and be sure to subscribe at thebeautifulclimb.com
- FREE GIFTS YOU'LL LOVE -
DISCOVER YOUR BRAND STORY IN UNDER 5 MINUTES
LEARN HOW TO WRITE AN ‘ABOUT ME’ PAGE THAT CONVERTS
MAP OUT 30 DAYS OF CONTENT IN UNDER AN HOUR
- READ THE LATEST POSTS -
MEET MICHELLE
Hey there, I'm Michelle Knight and I an online branding and marketing consultant for female entrepreneurs.
I believe in the power of storytelling and using that superpower to brand and market yourself online...oh and to set yourself free.
I'm obsessed with living a life of freedom, so much so, that my family and I now travel full-time while running my business from the road.
This blog serves as a home base for all things branding, marketing, content creation and more.

5 Must-Have Business Tools for Operations
I get it, choosing the business tools for your business is like trying to find a needle in a haystack. There are so many options it can sometimes feel easier to not use anything. Today, I’m sharing my favorite tools for Operations to hopefully make your life a little easier.
5 Must-Have Business Tools for Operations
BY MICHELLE KNIGHT
This post contains affiliate links which means if you make a purchase through a link, I may receive a commission at no extra cost to you!

One of the top questions that I get asked daily in my business is, "What did I use to do that? What do I use to run this? How do I do that?"
Everybody wants to know what tools I'm using, and I get it because there are a lot of options out there.
Today, I wanted to share those tools with you, but I wanted to share them with you in a way that is a little bit more streamlined, because we've all seen the blog posts that have 35 Business Tools, and we're like, "I don't even know what to do with all this information."
So, we're going to kick off a series that is going to share some of my top tools in business, but we're going to break it up into specific categories.
Today, I want to share with you five of the tools that I use in my business for operations. Think tools used for the day-to-day, working with my customers, handling payments, tasks inside of my business.
And before we get into it you should know I’ve tried so many tools in my business, like way too many to count. So, I’m hoping my need for in-depth research helps you streamline your process a bit and saves you valuable time.
So let's get into it.
MUST-HAVE BUSINESS TOOL #1: Kajabi
Now, tool number one should not come as a surprise to many of you if you have read some of my previous blogs.
The top tool I recommend tends to be Kajabi. You might know that I have a membership site called Brandmerry Academy. I also have a course that I've been selling for almost two years now called You! Branded. I also have group programs, special bonuses and deliver free content to my community and all of it is housed inside of Kajabi.
I love Kajabi because it truly is an all-in-one platform that was designed for course creators, but as you can tell, allows for a lot of different things.
Kajabi can have your website and your blog, to handle your checkout pages, your sales pages, to upload your course content, to email your subscribers, to email your clients, to have landing pages. There are so many options inside of Kajabi.
Over here at Brandmerry, we specifically use it for paying clients.
For my program Brandmerry Academy, or You! Branded, my clients will check out on Kajabi, they'll get access to the membership site in Kajabi, they will get emails from me and updates from me all inside of Kajabi.
It makes my life easier as an all-in-one platform to onboard and update my existing clients from one simple platform.
In the next few posts, I’m going to share more about how I use Kajabi specifically to host my courses and scale my revenue.
If you want to try Kajabi and give it a spin, you can go to brandmerry.com/kajabi for a 14-day trial and to check it out, see if you like it for yourself.
One of the goals as a business owner is to have recurring clients, and so many of my clients will go from You! Branded into the Academy and then maybe work with me inside of Roadmap to Freedom.
So they get to keep all of their awesome materials in one location, and it makes it a valuable and organized membership portal for Brandmerry clients, which I love.
So tool #1 is Kajabi and it’s what we use over here for housing all of our membership and paid content, and communicating with our paying clients.
MUST-HAVE BUSINESS TOLL #2: HoneyBook
The second tool that I love to use in my business is called HoneyBook.
While Kajabi is what I love to use for my clients inside of my courses, membership and group programs, I love to use HoneyBook to use with my private clients.
There are a lot of different ways that you can use HoneyBook in business. Many of my clients are photographers and/ or graphic designers and love HoneyBook because when they’re working with a 1:1 client and there is a lot of back and forth.
First, you’ve got the contract, then invoices, email communication, maybe proposals, proofs, etc and you want a way to keep that in one place for the client.
This is what HoneyBook provides.
At Brandmerry we use HoneyBook to create automated workflows and templates to streamline the entire onboarding process for my high-level one-on-one clients.
These clients start with applying for a one-on-one coaching spot, which is a form that we embed from Honeybook.
Then we have email correspondence back and forth to answer any questions about the timeline, support and pricing. All of this is housed in HoneyBook and can be easily read and responded to there, but also connects directly to my Gmail as well.
Then the potential client moves to paying the invoice, receiving and signing their contract and making sure additional onboarding emails for their folder, scheduling their calls, etc are all handled within HoneyBook.
We saved all those emails as templates inside of HoneyBook, which helps us automate so much of that process and also saves us tons of time. I also love how it tracks where someone might be inside of the onboarding process so we can check in with anyone who might not have responded or whose contract is up for renewal.
Also, many of my clients love the segmenting options HoneyBook provides.
For instance, let’s say you are a photographer and you have an inquiry form on your website. Someone can check different boxes, based on what they're interested in (i.e. wedding, engagement, newborn, etc…), and then go into different workflows with templated emails.
If you want to test drive HoneyBook you can use my link for a special discount and trial, depending on the package you choose.
MUST-HAVE BUSINESS TOOL #3: Squarespace
One of the top questions I get is “Where is your website, Michelle?”
And you might have just guessed it but my website is on Squarespace.
So as I mentioned before, you can have your website on Kajabi, but in the beginning, I wasn’t so savvy and tried to piece everything together.
So my website's been on Squarespace since day one and I wouldn't trade it for anything. I absolutely love Squarespace because it allows me to customize and design things without having all of the tech knowledge.
Over the years I’ve taught myself how to code and make modifications because I had a little bit of that past knowledge in my toolbox, but many of my clients don't have that, and they're not really keen on designing everything themselves, so Squarespace makes it super easy.
In addition to the ease of designing your website in Squarespace, I’m also a big fan of their Analytics and SEO (Search Engine Optimization).
Inside Squarespace, you have all of your analytics so that you can see your numbers. You can see what pages people are viewing, you can see where people are coming from, and you are set up for strong SEO on the platform as well.
You might know that I teach Search Engine Optimization inside of the Academy, and that's because I have used SEO to rank my website on page one for multiple keywords, if not the first spot on page one.
That's all done in Squarespace.
Many people think you need WordPress to do it and that’s just not true.
It's super easy to make sure that your page title and your page description, your keywords, and your alt text is all set up to support you in doing just that.
Squarespace is one of my favorite websites to recommend to my clients, so if you're just starting out and you're not necessarily ready to host courses and things like that, and you don't want to invest in Kajabi out of the gate, then Squarespace is a great option to start out.
Or if you're like me and you just want to pay for the best of the best, you just keep both of them because it's just easier that way.
I think one of my favorite things that I learned about Squarespace early on is that I didn't have to pay somebody to make updates to my website. I could do it myself. And there's something really empowering about doing that as a business owner, especially when you're starting out.
MUST-HAVE BUSINESS TOOL #4: Acuity Scheduling
There is a lot of scheduling that happens over here at Brandmerry.
We've got client scheduling, bonus sessions, all kinds of different things that need to work with my personal schedule, so having a central scheduling platform is amazing.
At Brandmerry, we use Acuity Scheduling, and one of the reasons that I love Acuity is because it allows me to set up tons of automation on the backend.
You guys are probably picking up on this, but I love a good automation.
It’s important to have automations in place to stay in contact with people who have booked with you and make sure that your time slot is on their calendar and they've got the information that they need for your call. So I love that Acuity allows me to set email templates to send important links for our Zoom room, to link a form that I want them to fill out before their session, or even send post-session automations as well.
I can send it all through Acuity to make sure my clients have everything they need.
Inside Acuity, you also can set your availability. So if someone goes to schedule a call, they aren't accidentally going to book on a day that I'm hanging out with my kiddo or I'm running errands or just want to take the day off.
Having a scheduler set up is essential if you want to have clear time boundaries in your business.
And some additional perks of Acuity are that you can collect payments and have submission forms and questionnaires.
So, for scheduling over here, we love Acuity.
MUST-HAVE BUSINESS TOOL #5: Zoom
That leads us to tool number five.
I feel like everyone, and their mom, and their grandma, knows this platform now because of 2020…
...and that's Zoom.
I've been using Zoom since the very beginning of my business, back in 2016 and have used it for my coaching calls, workshops, webinars, recording podcasts and more.
While I have a feeling you might already be using this platform, if you’re not and you’re having conversations with people, coaching calls, hosting webinars and want to record the thing then Zoom is a great choice.
CONCLUSION
So there you have it.
Those are the five tools that I love to use in my business that help with Operations. Go ahead and try some of them out, many of the links above offer discounts or free trials because they are affiliate links.
Hopefully, this helps you make some decisions and get started with streamlining and automating the operations side of your business.
Stay tuned for future posts on the series around productivity and marketing tools.
Watch the full video below!
P.S. Have you tuned in to The Beautiful Climb podcast? I release new episodes every other Friday on topics around productivity, motherhood, habits, goals and going after the life of your dreams! Check out past episodes and be sure to subscribe at thebeautifulclimb.com
- FREE GIFTS YOU'LL LOVE -
DISCOVER YOUR BRAND STORY IN UNDER 5 MINUTES
LEARN HOW TO WRITE AN ‘ABOUT ME’ PAGE THAT CONVERTS
MAP OUT 30 DAYS OF CONTENT IN UNDER AN HOUR
- READ THE LATEST POSTS -
MEET MICHELLE
Hey there, I'm Michelle Knight and I an online branding and marketing consultant for female entrepreneurs.
I believe in the power of storytelling and using that superpower to brand and market yourself online...oh and to set yourself free.
I'm obsessed with living a life of freedom, so much so, that my family and I now travel full-time while running my business from the road.
This blog serves as a home base for all things branding, marketing, content creation and more.